Showing posts with label RAW. Show all posts

Wish you a bubbly New Year!

| |
It's amazing how fast 2011 went by. It was an year with lot's of exciting changes. The customer response has been overwhelming in the last year. I am proud to have been a part in the life of so many newly weds and recently engaged clients by creating their custom rings that will stay with them for many years to come.

I finally made my Nodeform business a full time gig in 2011. It has been so much fun the last couple month working for myself. In September I went on a 6 month leave from my day job as an Architect to try to concentrate on really kicking this into the next gear. It took a while but the Holiday season finally paid off . I think it could be possible to be doing what I love and be able to support myself.  Tax season will show me if I am right or just an illusionist.

RAW52 #26 & #30 gold and silver Bubble rings rendered in Brazil for Rhino
Modeled in Tsplines and Rhino. Freeform bubbles.


I learned a lot of new thinks and developed my skills. The Ring a Week (RAW) challenge was a great experience in trying to learn 3D modeling software. I did not make 52 designs in the end but it still helped me coming back to it from time to time and try something new. I will continue in the next year developing this a bit further and eventually even incorporate it into my ring production and custom designs.
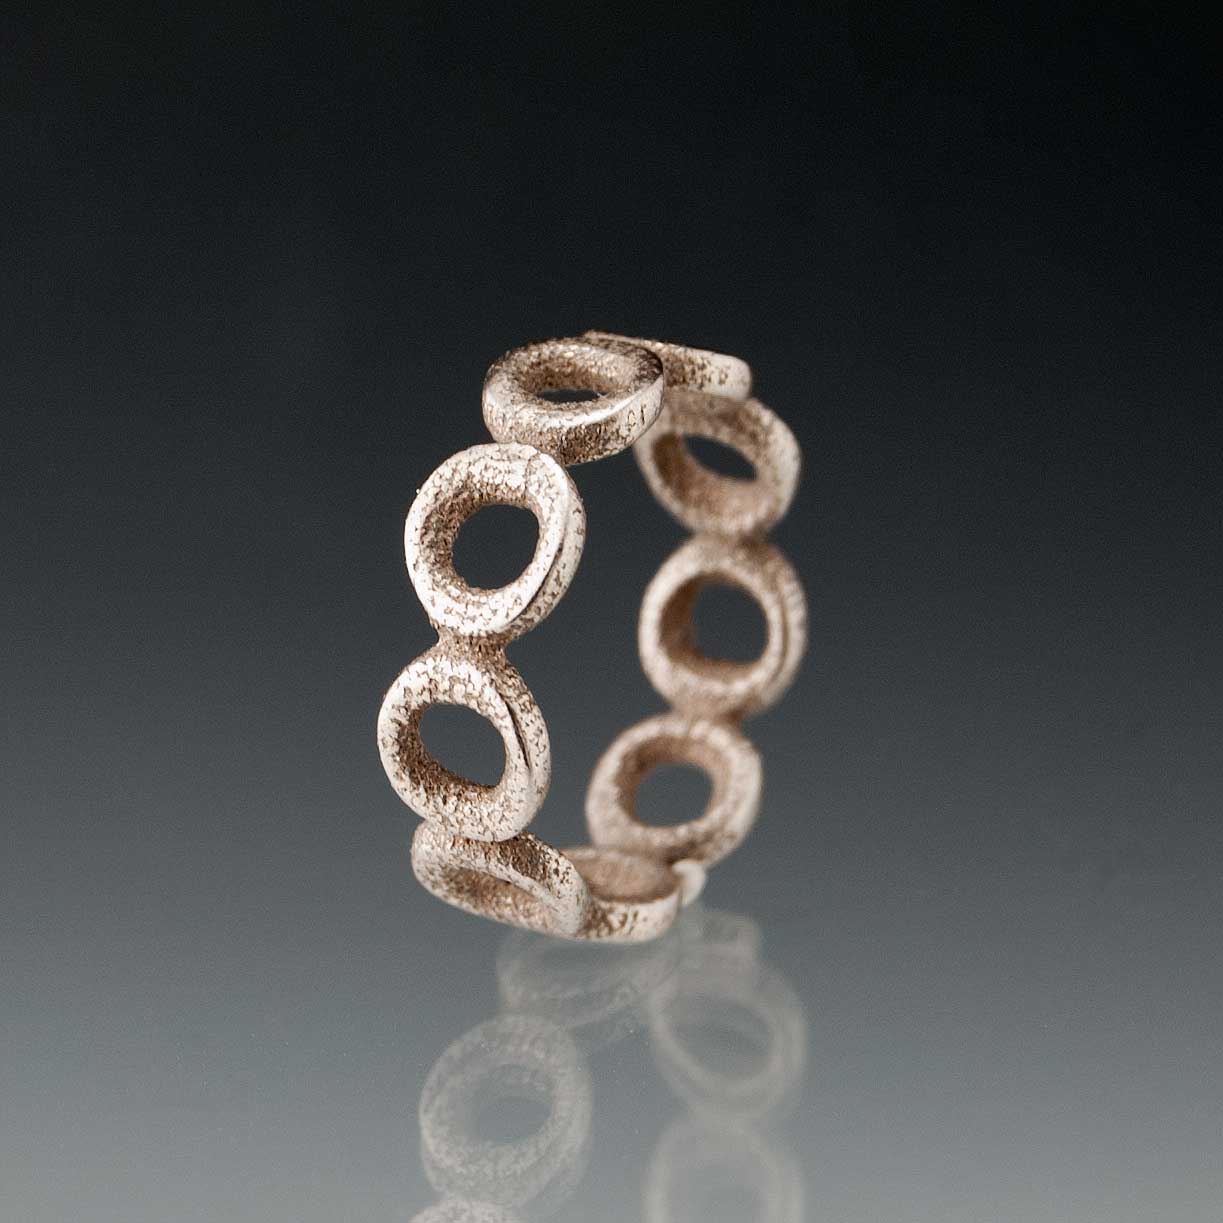

3D print in stainless steel of RAW26/52 model. Printed by Shapeways.

3D print in stainless steel and Frosted Ultra Detail of RAW26/52 model. Printed by Shapeways.

I also started playing with rendering software in the last couple days. It's could be a nice way to be able to post new designs and material options without actually having to produce them in expensive precious metals and gem stones. This could keep my money, usually tied up in inventory stock, in my pockets until I actually get a order in. Well, I have to get better with the software until I can produce convince able images of how the finished piece will look.

RAW52/31 Palladium Bubble ring with Diamond rendered in Brazil for Rhino
RAW52/33 Gold Bubble ring with Diamond rendered in Brazil for Rhino

RAW52/32 Silver Bubble ring with Sapphire rendered in Brazil for Rhino

To see all my submissions for this challenge go to Flickr.

With that  I thank all of my friends, fans and clients for your interest and support in my adventures. I wish you all a Happy New Year! Enjoy some bubbly treat tonight to celebrate New Eears Eve.


.

RAW52 #25 & #29 Wavy Ring

| |
I recently got a few of my latest RAW submissions printed in different materials. I send this wavy ring design off to Ponoko and Shapeways to test service and printing quality.

Wave ring printed in Stainless Steel
I have to say I am way more impressed by Shapeways. Their material choices are greater and the prints came out cleaner. Their Frosted Ultra Detail prints are impressively detailed with only very fine printing lines. I still have to try casting one of those in silver to see how they burn out in the lost wax process.

3D prints of RAW25/52 model in Stainless Steel, Black Detail and White Detail plastic and Frosted Ultra Detail. Printed by Shapeways.
 The stainless steel rings are always great with an interesting texture. It took 2 weeks to get models delivered from Ponoko and 3 weeks from Shapeways. Ponoko has trouble with printing lot's of my designs as they seem to small for them. Not an issue with Shapeways, especially the ultra detail material allows very thin parts in the model. Uploading models and organizing it for printing is easier on Shapeways.  So I guess I stay with Shapeways.

A couple shots of the stainless steel print.

The model was done using T-splines for Rhino 4. The smooth wave was laid out flat and then bend into a ring shape.  I also tried lofting curves and 2 rail sweeps directly in Rhino without t-splines but it got some wonky areas. The edges are sharper with this approach seen in the images below.

Rhino4 render image

I did start playing with a trial version of Brazil for Rhino to render some designs more realistically looking. I am still a bit confused with all those settings that need to get adjusted to get an image. Easy to spend hours on this.


Rendering in Brazil with gold material settings

Making of Custom Square Rings, Part 2

| |
I did finish the ring set for the Square 1 engagement/ wedding rings a couple weeks ago. I hope the groom to be already proposed so my post won't ruin the surprise. For a description of the first part in making these custom rings that used CAD 3D modeling see this post.

RAW52/24

The rings cleaned up easily after  the casting and the settings were so perfect that the stones went in smoothly. It's always such a treat to set something in 18k gold instead of 14k. The higher carat gold is so much softer and easier to bent against the stone. And the color is such a treat to the eye.

I love how the earth colored diamonds complement so well the warm colors of the 18K gold and the orange and green sapphire. Unfortunately the customer did not expect the diamonds to come in a range of colors. They had not seen my other listings and photos that show the entire earthy color range. They only looked at one photo that shows the ring set with one gray cube. I was asked to replace the colored stones with all light gray diamond cubes.

Lesson learned that there is never enough communication when it comes to custom orders. Something that is obvious to me might not be so obvious to the customer. Since the main goal is to have a happy customer, I had to do some research. It took me 2 weeks to actually find a couple more gray cubes in that particular size and in nice shapes.

Not all rough diamond cubes are perfectly shaped as a cube. They really are rough, they don't come all in the same even size like callibarted man-cut gem stones. Nature just does not work like that. To actually get a good set of 5 matching cubes I had do order a lot of more than 20 stones and then try each in the setting until I has happy with the combination.

DSC_9786

The 18k setting fortunately was soft enough so I got all those colored diamond out without having to cut open the gold setting and having to solder a new setting one on.

DSC_9757

Here the set with the all gray rough diamonds cubes. 

I did use the rings as my submission for the RAW challenge and they became # 23 and #24. I also created some settings for 1, 3 and 4 stones. I will list those in my shop as I still find the off center setting with fewer cubes more intriguing than the row of 5 diamonds. This one will always be special for that happy couple.
.

RAW52 #9 to #13 & #17- Elliptical Loft Rings

| |
I am cheating a bit with my RAW submissions by using slight variations of the same design for multiple weekly entries. After all the final outcome is still multiple "different" rings. Small lies sometime help to stay in the game. If I would feel like being more than 10 weeks behind, I would probably just give up on this challenge. I am basically just cheating my brain a bit. So far it seems to work as I still continue to play with  the software and come up with some  new designs when creativity strikes and time permits.

RAW52/17 various


RAW #9 to #13 design was done by lofting ellipses and then flowed over a ring tube surface of different width to make the various ring width from 3 to 15 mm.

RAW52, raw-09 to raw-13
Here the screen shot from Rhino.

RAW52/17
RAW52/17
Rings were 3D printed by Ponoko in white plastic.

RAW52/17
I attached casting wax sprues (gates) to the insides of the rings to maintain the printing texture on the outside face and cast it in Sterling silver. The inside of the rings was sanded after that and polished, the outside was just lightly polished and tumbled.

RAW52/17 row

Silver rings in various widths.

RAW52/17 stack


Love the layered texture from 3D printing process.


RAW52/17 medium stack

The middle ring was oxidized  with LOS.

RAW52/17 zebra
Rings can be worn stacked together.

I think the narrower rings have some potential but the design needs to be cleaned up a bit. The very wide ring is a bit too wide to be comfortable.


RAW52 #8 and #18 - Loft Ring

| |
I just organized my RAW submissions on Flickr again. I am still a couple weeks behind with my weekly challenge but hopefully I am on a roll again for a couple more.
Here is a lofty ring I finished a couple weeks ago but never blogged about:

RAW52/08

Playing with simple lofting for this wonky ring. It looks a bit like an endless worm.


I also sent out some designs for 3d printing at Ponoko. Not all modeled ring designs were suitable for printing. Some had areas that were too thin or the model was not clean.

This lofted design looks like this in 3d printed white ABS plastic and became my #18 RAW ring (sorry I am jumping ahead a bit).

RAW52/18


It's probably not a design I will keep making more in the future but it was a nice experiment.

Making of Custom Square 1 Rings

| |
I am working on a custom order for a engagement/ wedding ring set from the Square 1 collection. The rings are to be done in 18k white gold with yellow gold settings and 4 to 5 rough diamonds instead of 1. They still include the rings with the orange and green sapphire.
The square settings I usually use with the silver rings are only available in 14k gold and making them by hand did not work out so well without having a square bezel punch set.  I did a couple tries with silver bezel but I could just not get them perfect enough to be happy about them. Since the rings will be done in such an expensive metal, I want them to be absolutely perfect and not wast any gold in making them.

I decided to use some of my still very limited 3d modeling skills that I gained through the RAW challenge and modeled the rings and settings in Rhino3D.


The advantage is that especially the underside of long setting now matches exactly the curve of the ring and fits like a charm. And the seats for the faceted stones in the small square settings are perfectly even. I did model a couple alternate settings for 3 or 4 rough diamonds to be able to play around with the design a bit more and offer more choices in the future.

Then had them 3d printed on one of those really high resolution wax printers. It cost a lot more than the printing available through firms like Shapeways or Ponoko, but it's worth it since it requires less sanding to get the parts smooth. And I needed very crisp edges. Thats how they look in printed wax.

Glad the diamonds and sapphires actually fit in there. 


The longer settings are really fragile in this state and break easily as one can see. I should have modeled the casting sprues (gates) already on them to be able to handle them better. Lesson learned.

After smoothing the sides of the rings a bit with fine sand paper they went off to my local caster. I can't cast Palladium White gold in my studio as the equipment does not go up to high enough temperatures. I also did not want to take a chance with the yellow gold settings and sent them out too. 
Luckily it only took 2 days for Precious Metals West to get them back to me. They got most of the settings cast without braking them, yeah! That is how they look after casting without being polished. 


Now I will spend my weekend with filing off the rest of the casting sprues, cleaning and sanding all parts and soldering the settings to the rings. Then stone setting and final polish. I will post the final rings when they are done. 

More photos can be seen on Flickr.


RAW 07/52 - Vow Ring

| |
Just realized I never updated the bog with my more recent RAW submissions.

RAW ring #7 is a wedding ring with vow that reads: WITH THIS RING I SEAL MY VOW OF LOVE TO YOU.

The text is extruded and flowed around the ring opening. I have to figure out how I can squeeze the letters together so they overlap and would not need the ring bar to hold them together. Thats another week's assignment.

I am curious to see how the texture at the band top will look when printed in 3D and if the text is still readable when printed.


.

RAW 06/52

| |
Good news was that Rhino came out some weeks ago with a free beta version 5 for OSX MAC and I had to give it a try. Since I am a total beginner anyways I can't really say  if it works any better or not. But it's nice not having to work on the window's version via Parallels.

This weeks ring was a spin off from the open strip ring I did  in RAW 03 to 05. It's a bit higher version and more sculptural. Since there are no plugins (T-spline etc) yet for the new beta version I just modeled it completely in Rhino. It actually was not to hard to model. I haven't tried to 3d print any of my rings yet. I am curious if some of those edges are to thin to be printed. I guess I will see when I get there.

The only problem I really had with the Beta version for MAC was that the render function seemed to crash the program. Therefor I only have a screen shot pictures.


Now I am only 3 weeks behind with my challenge. I guess I have to find some time this weekend and model rings instead of doing my taxes. It's more fun anyways.
.

RAW 03, 04 and 05/52 Rings

| |
I am so behind already in my RAW challenge and that only after  a few weeks since it started. I haven't found much time to play around with 3d modeling lately. January an February were pretty busy (which is a good thing). I struggled keeping up with orders and all those "millions" of rings I cast with my new casting setup. So much fun to do the casting again. But as a result I have a stack of raw cast rings on my bench that need to be filed, polished and stones set. Unfortunately my challenge for RAW is about learning the software and therefor I can't use those cast rings as my RAW entries.

I did play around with some simple anticlastic strip shapes in Rhino. Originally those were just options with some deformations for the same idea and should be counted as only one weeks challenge entry. But I decided now to count each option as a ring and get up on my schedule again. The deformed shaped originated from the simple strip on the left. I just moved pointed around to widen certain parts and give them a more dynamic feel.


Overall I still struggle alot with getting a feel for the software. It just does not feel as natural to me as modeling wax by hand feels. But I hope over time I get more used to it and really develop new possibilities for my ring designs by using 3d software.
.

RAW 02/52 FOLD Ring #2

| |
I got a bit behind with the new designs for the RAW (Ring A Week) challenge since I was trying to catch up on orders and test my new casting equipment.

For the second ring I still went somewhat with the fold scheme. I modeled a simple ring. it has a fold line at the center with various depth. After I thought about how to model this design for the last two weeks it was actually pretty simple do get it to work at the end. Just drew the outlines and some cross sections and created the inner and outer closed loops with a 2 rail sweep. The sharp edges were bend by a bit to make it more comfortable. I am curious to see how this actually feels on a finger.


I think I will model one more design before I sent it off to the 3D printer.

RAW 01/52 FOLD Ring

| |
My first RAW (Ring A Week) ring is finally modeled and ready to be 3D printed. I used my inspiration images posted a couple days ago for the FOLD theme. For the first ring I kept it simple since I am still struggling to figure out how to model things  with this software. The simple bands outer face has a smooth folding surface that resembles something close to flowing fabric folds.


I modeled it using T-splines plug to get the smooth folds. Lines were laid out flat over a surface to create creases.  Peaks and valleys could be adjusted by moving surface points. After that I used the command "flow along surface" to wrap it around the inner tube.


side view

Top View

 I uploaded it to Shapeways for 3d printing in stainless steel. But there is a minimum order amount and  I will wait 1 to 2 weeks to have a couple more rings modeled before I order them. I also still want to inscribe  my name and the RAW ring number into the inside of the ring. Since this is stainless steel I don't think I can use my normal steel stamps to put my makers mark in them.
So I guess I will play around a bit more this coming week.

Update:
Got printed ABS models back from Ponoko and did some test castings. Love the texture of the 3D printing lines. The inside  was polished and the outside  was left with printing texture.

RAW52/16 cast2


RAW52/16


RAW52/16


Related Posts with Thumbnails