Showing posts with label wax models. Show all posts

Half Eternity Rings - from Design Idea to the Wax Models

| |
This is a description on how I can get from a idea in my head to having castable wax models in my hand by using new prototyping technology as opposed to carving directly in wax by hand. I still carve about 90% of all my design by hand. But some designs are just easier and more effective to do using CAD tools. It still takes considerable time to model and then prototype. It's definitely not as quick as some might think. It does not make sense to use it for one off designs but it's a great tool for designs using repetitive elements. It allows me to do more precise and detailed work than what I can do by hand carving. Eternity bands with repetitive settings around the entire ring are a great example for using CAD.

Real eternity bands are so tough to size with the pattern or settings needing to be equally distributed around the entire ring. It always ends up being a huge mess when people did not give me the correct size upfront and then need it resized. I usually end up making a totally new ring. This happened twice in the last 2 weeks with an order for one of my Wave rings. Now I am on the 3rd ring to make for that customer. Well, I am really learning how to make this ring in various sizes. :) The half eternity design one should solve that issue as the lower shank part can easily be cut and resized. Plus it also makes the stone setting go faster. Makes a huge difference in time and ultimately cost if there are 4, 8 or 16 stones to set in a ring. For this one I wanted to use 2mm round faceted stones for simplicity. So that is what I have in mind:

Rendering of ring design.

Let's start:
I modeled one rounded, kind of blobby looking, setting at the top. Lot's of pushing and pulling to create the shape. This works similar to clay modeling just in the digital world. That's why I love T-splines modelling software so much. It allows me to work with those digital tools pretty similar to how I carve my wax models by hand just using the mouse pointer and not carving tools.
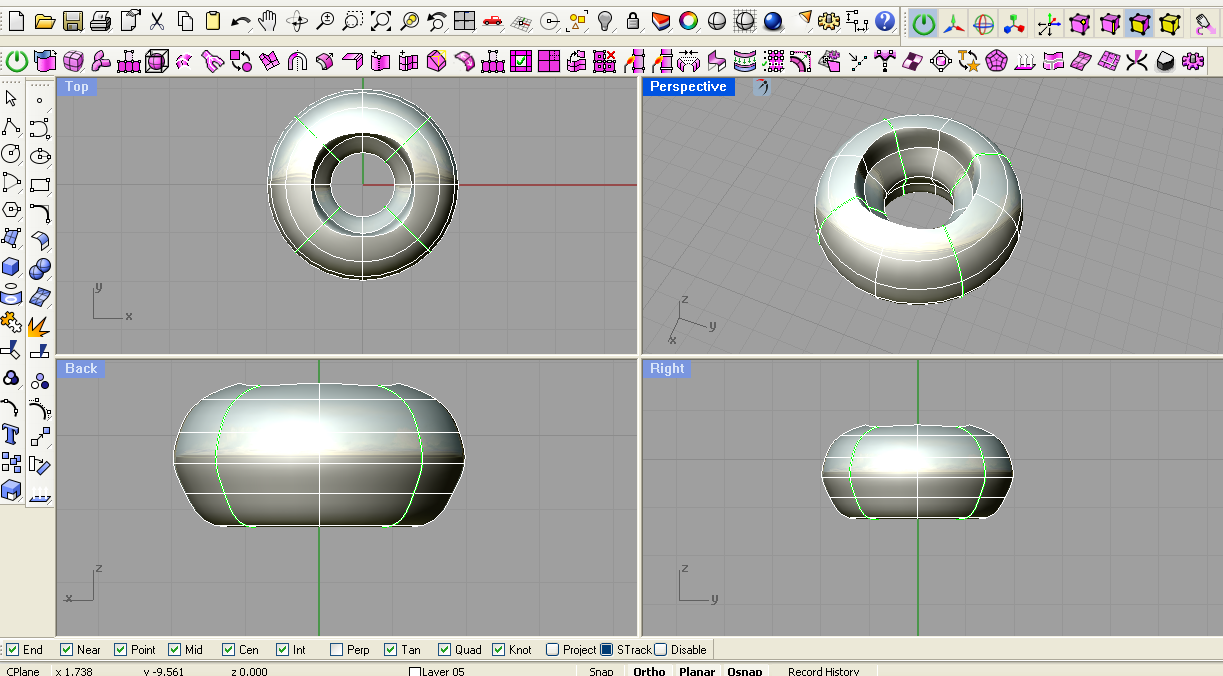

round bubbly stone setting

After I had the main setting I used what works so great in CAD: the ability to copy things. I can use a radial symmetry function that allows me to array multiple settings around the center. With that only one setting get's modified until I am happy with it. All the copies, that were arrayed, get updated with those changes automatically. It's a huge time saver and I can do lots of modifications on the fly. I LOVE the symmetry function in T-Splines! The green lines in the model represent where the symmetry axises are. If all is to my liking, the copied settings just need to get bridged together to make one uniform connected model. 

Array of 4 bridged round setting
A lower shank was modeled and connected to the last setting on each side.A bit more pushing and pulling to get the final shape perfected.


I also thought to try adding a matching stacked band next to it. So I extracted the isocurve of one side of the ring and used it to create the band that would snuggle perfectly next to the stone set ring. The curve was extruded to create the ring width. The "TSthicken" function then created a volume out of the flat surface. 
Creating the matching stacked band.

 Lot's of "digital clay" pushing and pulling to give the band the final shape.


Final ring set.

 Quick renedering to check the design. 
Rendering of the rings without stones.

The models then get converted from T-Spline models into to Rhino Nurbs.

T-splines models converted into Rhino-nurbs.
This then gets converted into a mesh and exported into a STL file that can be read by a 3D printer or CNC milling software. The big advantage of working with T-splines is that the models are always watertight, fully closed without any open edges. When I previously was only working with Rhino and tried to create similar blended surfaces, I often encountered that the final models had tiny openings from blending operations. It made it impossible to print or mill them as the prototyping only works with completely "watertight" models. Since using T-Splines I never encounter that frustrating problem again and creating smooth blended transitions is so much easier now.

Mesh, ready for export.

Previously I would now send this STL file to a 3D printing service to either get a high resolution (and expensive around 80-100$ per ring) resin/wax model printed in 3 days or send it to Shapeways for a lower resolution print in their Ultra-detail plastic that cost around 6$ per ring. It takes a bit longer (about 2 weeks) and the prints have a bit of texture (which looks sometimes really nice if I am going for that textured look). The models can be cast directly but the burnout is not always totally clean. One can also make a silicone mold of the printed model and than create wax copies. The wait time and/or higher price for the high resolution models usually put a big stop on my creative flow when I wanted to come up with new designs.

Beginning of May I got a used CNC mill from Otto Frei. It's a Roland JWX-10 4th axis CNC mill that came with Protowizard software and ring fixtures.  The customer service at Otto Frei was great. They serviced the machine, calibrated all the fixtures and even provided support over the phone to get it setup and started. It's an expensive tool, even used, but so much fun. It opens up lots of new possibilities. Now I can go from idea to having wax models in my hand in the same day in just a couple hours and start casting afterwards immediately. It allows me to really try of lot's of options and evaluate them quicker. It will take a while to recoup the cost but I think it's worthwhile.

So with that new tool I transfer the STL file from my MAC book pro where I model (in Rhino4 for Windows via Parallels) to my old PC that is connected to the CNC mill.

Programmed milling path with supports and CNC mill on right.
There in the protowizard software I program the milling operations, set tools, supports and milling path. For this ring I chose to use the Tube Wizard as it allows me to mill both rings at the same time. It will only mill the outer surface of the ring, not the sides. But the detail on the sides it easy to do by hand after it's milled as it only required some rounding with some wax files and smoothing with sand paper. Milling never does undercuts like hollowing out the underside of a setting. Those things have to be done by hand carving the wax. Since I am used to carving it's not a problem for me. The milling waxes are the same as the carving waxes. They can easily get modified after milling to do adjustments needed for proper stone fit, hollow out and casting preparation.  Models with lot's of undercuts are better to be done by 3D printing. But those machines are a lot more expensive and the models are not as easy adjustable after they were printed.

The programmed path get then loaded into the mill software. The mill gets prepared by inserting the right milling tool bit, a wax rod is mounted on the rotary fixture and the zero point set to make sure the tool does only mill wax and does not accidentally run into the metal fixtures. Then it starts milling.  Here a video of the mill in operation :


A single milling in fine mode for these 2 rings takes about 50 minutes to complete.

More more complicated models that first get milled on each side with a flip fixture and then on the rotary axis this whole process can easily take 2 hours and requires tool changes in between.

Finished milled rings still attached to the wax rod via rectangle supports.
So from this point on all further work is done by hand just like I do all my other rings from the tool mark removal, to casting prep, metal casting itself and then all the clean-up work after the casting, polishing, stone setting etc. For this milled part the wax shavings need to get cleaned out and the rings cut off from the supports. The sides get filed to remove the support stubs. Then I size the inside with a wax reamer and adjusted any other things like smoothing the inside, hollowing out etc.


Finished wax models ready for casting prep.


I like it and went back to model software to play with a few design modifications like making the settings into a half bezel by cutting out a path. I also played with different width for the matching wedding band and created a set for slightly larger stones by scaling the settings. It's fairly easy to go back to the model in T-splines and make changes, then reconnect the parts and do the steps for the model export again and bring it into the milling software.


Stacked rings.


Variations of the same design by altering the settings in the CAD software and playing with different ring width.


So at the end of the day I had 3 rings sets that could be cast in the next few days.


Halo's and Flying Saucer Rings

| |
I had this idea in my head for a while to do some halo design inspired rings. I finally carved a couple wax models for these new design prototypes.

The halo tops were turned on a Foredom lath and then attached to stubby prongs on a hand carved rounded ring band. This gives it a "flying saucer just landed on a ring" look  :)

The first ring would be for faceted 5mm stones like diamonds, moissanites, sapphires etc. The center stone would be set flush into the halo. I guess small tiny gem stones could be flush set all around to give it even more sparkle. But usually I go more for the understated look, I prefer the cleaner version without added small sparkles on the wide rim.

Wax model of Halo ring with moissanite

Side view showing the elevated Halo top
Underside of Halo ring

Ring on hand
The second design is for a one-of-a-kind giant tourmalinated quartz with an unusual buff cut.  This will be a freaking gigantic cocktail ring :) I added later 4 flat prongs to the inside of the halo to hold the stone.

Halo ring for unusual black needle quartz

Side view

Wax model shown worn on hand
 The rings are already cast but I still have to find time to do all the finishing work. Might take a while since April seems to be a very busy month for me.

Carving a Bezel Setting in Wax

| |
In this post I want to show the first steps in making a ring with a bezel setting for a 5.5 mm square cushion cut Moissanite. The image below is a rendering done in CAD that shows the simple design for this ring setting. The setting "grows" out of the ring shank in a fluid, blended movement. Wax carving is a great way to archive those blended transitions between shapes as the wax can be sculpted and carved. It would be way harder to do the same by fabricating the ring in metal or would mean grinding lot's of metal away. It's way easier to sculpt something in wax than it is in precious metal.


A bezel setting is a very secure setting type for a gem stone. It has a metal rim that encircles the sides of a gemstone and extends slightly above it. The rim, or collar, in a full bezel stretches around the gem's entire circumference. Variations are possible by removing parts of the rim to create half bezels or other similar setting designs.


I start most of my ring carvings by slicing off a section from a wax rod with a back saw in a miter box. The thickness of the band gets marked on the rod by scraping a line with dividers. At this point I rather make the slice a bit thicker than required. Excess wax can easily be removed later. The wax rods come in various sizes and different shapes.

Various carving wax rod shapes
For this size 5 ring I chose a the smallest rod with the center hole. It's the closest shape to the section of the ring band (disregarding the setting). For larger man's ring I usually use the thicker rod, for more sculpted rings with a heavier top section one of the other shapes with the off center hole. I usually work with the blue carving wax as it has great flexibility. But the green or red Matt carving waxes would work too. I never use Wolf carving waxes, but I imagine they are quite similar.

The center hole will then get enlarged to the appropriate ring size by using ring tube sizer, a wooden mandrel with a sharp steel blade. The sharp blade cleanly shaves the inner wall, enlarging wax rings and leaving an even, smooth finish. Then the outer side can be filed down if required or this also can be done at a later stage especially if the band will have a rounded shank and varying width and shapes.

Matt Mini lath on Foredom Flex shaft with mounted wax rod.
An alternate approach would be using a lath to create the shank.


Wax shank blank and cushion Moissanite gem mounted on a sticky wax holder.
Next I start with modeling the setting to the shank blank. The gem stone gets placed on the shank by using a tiny amount of soft sticky wax like brown crystalline wax. The brown wax allows to adjust the placement making sure the stone being centered on the shank and the table to be totally square and not tilted.


If the stone needs to go a bit deeper in the shank, either a small hole gets drilled into the wax and the stone placed in that with it's pointed underside. Or I heat the wax blank where the stone gets placed with the tip of my electric wax pen and just press the stone into this liquid setting bed. Check carefully that the stone is positioned centered and not crocked to one side.

The carving technique I use is a mix of subtractive (carving excess wax away) and additive technique (dropping tiny amounts of liquid wax on to the design). For adding wax, a electric wax pen comes in handy. The added wax is the same type as the carving wax, I use scraps and shavings from previous works. The electric wax pen I use has different temperature settings and a foot control paddle that allows me to vary the amount of heat very well and get the wax in the right consistency. A dental pick heated over an alcohol lamp or torch could be used too but it's pretty hard to get the temperatures right (I never got it to work). Some wax pens like those battery operated thingies don't get hot enough to melt carving wax. The proper temperature is between smoke and stringy wax. If the molten wax starts smoking, it's too hot. If the wax is stringy and mixed with air bubbles, the wax pen is too cool. Find the correct temperature for the task and build up the wax until you have enough. You can always add more or carve it away later.


Here I started adding liquid carving wax all around the stone, letting it flow a bit over the rim  and higher than the table of the gem. Dripping very liquid wax under the girdle of the stone will give a perfect seat. I also added more onto the shank area around the stone and create a blending surface. With a wax pen I pick up tiny amounts of wax and let them become liquid enough to form a drop. This picture shows the setting being built up, but the surface is still lumpy. It is crucial to check for air bubbles trapped below the surface and removing them before proceeding to the next step.

Rough carving of the setting

Then I start carving the lumpy surface to create a shape that is close to the final setting, blending the side walls to the ring shank. I use various wax files, scrapers, X-acto knife, 3M medium sanding sponges etc. If too much wax gets filed away, additional wax can just be added using the additive technique. Wait a minute to let it cool and harden before filing again. All this is a very meditative process for me. One can't rush trough it but needs to go with the flow, often stopping for a bit to let the wax cool before adding more.

Wax working tools

For removing large bulks of wax on a band I use cylinder burrs with my flex shaft, adjusting carefully the speed and pressure. It just needs a light touch to carve the wax away. Don't let the bur get hot to start melting the wax. Round wax burs are great for hollowing out shanks on the underside or opening up a hole under the gem stone.

With tip of a knife I carefully cut the excess wax away from the top of the stone exposing the girdle of the gem. Be careful not to scratch a gem stone when working with softer gems.
Once the wax on the top of the gem is removed the stone needs to get taken out of the setting to make adjustments to the seat. If a hole was drilled in the beginning before placing the gem on the shank, one can just use a wooden tooth pick and push the stone from the underside gently out of the setting. If there is no hole, carefully create one by rotating a small bur, carver or needle file by hand and slowly remove a small portion of the wax under the gem stone point. Once wax film is really thin push with a wooded tooth pick as not to damage the fragile tip of the gem.

Then examine the inside of the setting and make adjustments to the wall and seat as required. This is the most tedious part. One needs to check the seat often to make sure all is even. The gem needs to easily be placed and removed from the seat. Carve side walls inside away to create a upright wall that later can be pushed over the stone girdle. The side wall needs to be higher than the girdle. Keep shrinkage during the casting process in mind. The cast ring will be about 2% smaller than the original wax model. Also remember that wax has some spring and elasticity while metal is stiff. If a stone fits in the wax setting, it might be too large once the ring is cast in metal. However, it is possible to remove metal after the casting with burs and gravers, but it's not possible to add more metal. It takes lot's of trial and error to find the right balance of what needs to get done in wax and what is better adjusted in metal.

I check the model often by holding it against a light. The thinner the wax is the more translucent it gets. It's a great way to see if there are any areas that are too thin or to heavy. Carve as necessary or add more wax and smooth it out again. If there is a crack, a pit, air bubbles or a scratch it will show up in the casting too. Any imperfections in the wax model translate into metal casting. The wax surface gets smoothed by moving through various stages of  3M polishing pads, smoothing more with a felt stick and some wax solvent rubbed over the wax with a piece o a nylon hose. The smoother the wax, the faster the clean-up in metal will be.

Ring wax models mounted on flask bottoms to be prepared for casting

Once the wax model is weighted it gets prepared for casting and mounted on sprues (gates). Then placed on rubber flask bottoms. All models placed in the same flask will get cast in the same metal. A stainless steel pipe section gets placed over the models and filled with a investment plaster. Once it sets and hardens, it gets placed in a kiln for multiple hours until the wax is all burned away leaving a hollow space in the investment plaster.

Casting flask in the burn-out kiln.

During the actual casting liquid hot precious metal will fill that hollow space, creating a slightly shrunken replica of the previous wax model. Then a lot more work is needed on the metal pieces before the final ring is done.

This wax carving technique I use is great for creating settings for unusual shaped, non-round stones. It can be used on round gems too. Round settings are the easiest to create as wax burs and other rotary tools can be used to easily carve a perfect seat for the faceted gem. It is tougher to create settings for stones with corners, fancy or uneven cuts. By adding wax directly to the gem stone, the stone basically become the mold for the setting, getting a perfect shape faster than by just carving it out of a block of wax. Be careful when using this technique on soft and heat sensitive stones. Sometimes it's better for those to either use waxes that have a lower melting temperature than carving waxes or use a different technique all together.  A great tutorial of a built-up setting for a shell can be found here. A wax carving book I would recommend is: Basic Wax Modeling: An Adventure in Creativity byHiroshi Tsuyuki. Lot's of great step by step wax techniques are shown. Kate Wolf's wax working work shops are also known to be great.

Wax carving is a fun process and has almost unlimited design possibilities.


Pink Sapphire Wedding Band

| |
I am  starting to work on new designs for the upcoming wedding season. The first one is a wax prototype  for a rounded wedding band with multiple small flush set pink sapphires. It also has a texture of tiny circles randomly around the sapphires. This ring has six 2mm sapphires in total. The stones are only on one side and don't go all around the entire ring.


Lets see how this will turn out in metal. If it's nice I will offer this with other gem stone options too like diamonds, moissanites and blue sapphires.

I am adding to the post to show how this came out in metal.
  
Sterling Silver ring with pink sapphires.


Ring is also available with white diamonds.

 More diamond and sapphire colors are available in my Wedding shop on Etsy.

Tail Pearl Ring

| |
While working on some wax models the other day, I started playing with some broken off tail wax parts from my Mermaid rings. I connected 2 tails and figured this could be a good start to a new ring design using some white freshwater pearls I have.  I added a wax bridge at the top to make the setting for the pearl. This part still needs a bit of work before the design is ready for a test casting. I think I like the direction this is heading to. It's a very dynamic design and will get lot's of attention when worn.


Engagement Season

| |
After weeks of designing a new collection of wedding rings I now switched over to engagement rings. The engagement season is coming soon. It seems the that the time between Thanksgiving and the Holidays, or even Valentines Day, engagements are on a rise. It's the time of the year that focuses on family and home. An ideal time to pop the question and then celebrate with the entire family around.

wax models for new engagement rings

I haven't designed rings with main focus as a engagement ring before. Lot's of my other gem stone rings were used as unconventional engagement rings. I sometimes find out from the groom or even later from the bride that my Tahitian peal ring, the Flow rings with diamonds or of course the rough diamond rings or even the unconventional larger gem stone rings were used to propose. I still also love when the bride to be selects her own engagement ring. Surprises are very romantic but one should have the ring they love to wear forever.
The last few weeks I was sourcing suitable stones and thinking about designs.  Here a couple designs I carved this week in wax for some of the stones I already have.


Show here are wax models from "Fold" collection with 1.2 carat cushion cut 8 x 6 mm Morganite on left, 0.9ct cushion white sapphire in the middle and 1.1ct 6mm round Songea green sapphire. The white sapphire and morganite ring were sent out to be cast in palladium. I  did a morganite ring before in palladium and that light pink beryl gem looks so great combined with that metal.
I do like the round stone version of this "Fold" ring design. I still have lots of other round stones that I can use for this and especially a 6mm round blue sapphire and 2 orange Songea sapphires. I am casting this round one today in silver first and will be perfecting the shape and setting a bit more before I send it out to be cast in palladium.


Wax model with freeform shaped roughly 0.45ct/ 6 x 4.5 mm rose cut blue sapphire. I do have a couple of similar rose cut sapphires in different shapes and similar sizes available. This will allow me to offer this design for custom sizes and different metal options. This ring is being cast in silver today, palladium options will follow soon.


A design for a marquise cut ruby. The stone is about 0.45 carat, 6.6 x 3.5 mm. It's a tough design to get the symmetry perfect with just hand carving. I might actually model this on a computer in CAD again to archive perfect symmetry and  crisp lines. For now this hand carved wax is being cast in silver to see how it looks. I do have also blue sapphires in that size and lots of other marquise stones.


I also did a very minimalist design with a simple 4.5 mm band and a square bezel setting for this 3mm blue sapphire. It could be worn stacked with this shown matching narrow wedding band with optional 2mm sapphire set flush in the band. These are my prototypes that I am casting in silver. I will model this in CAD for a crisper look.

I accumulated over the years a lot of smaller gem stones especially sapphires, tourmalines and some rubies that are perfect for engagement rings to be worn every day. I also kept the bands simple to be able to wear a wedding band stacked next to it.

I don't plan to purchase any large faceted diamonds but rather go for moissanites instead. Especially after reading the book "The Heartless Stone" I don't feel compelled into using  these large overpriced and politically so controversial diamonds.  Moissanites are man made gem stones with more fire and brilliance than a diamond. It's hardness above 9 on the moh's scale and makes it harder than sapphires or rubies. No mining has to be done for these stones and they are guaranteed conflict free. Combined with recycled precious metal they are the perfect choice for the eco conscious person. I am waiting for some of these moissanites to arrive to then come up with some designs.

.

Pages From My Sketchbook

| |
I don't sketch, ever! Ok, sometimes. But those ideas that I sketch, never actually make it into a real thing. It seems that once I sketch it, I got it out of my system and don't have any desire to work on it anymore. So therefore it's better I just don't sketch. Like these ideas for new rings:

Idea for a wavy, fluid ring design with a pear shaped blue topaz. The sketch still hangs on my black board month after I sketched. Still never worked on making it into a wax model or even cast in metal.

Elaborate design for fused gold on sterling silver with garnet sparkle. 

I am more productive without sketching. I do brood over new design in my head for days or weeks before actually trying to model them. I sometimes have a vague image in my head and then just start with a new piece of wax and just carve it out there. Once I get into carving the design changes a bit, which is good. I find new ideas when I model in wax. It's as if there is a piece hidden in the wax block that just wants to grow out of it. The wax block, heat pen and carving tools become my "sketch book". 

I have the advantage of working/ sketching in a cheap material like wax. If I screw it up or decide I actually don't like the design, I can just trow it away or melt the wax into something else. If I would do more fabrication work, I would start sketching more. It would be way smarter to sketch on paper before actually cutting into expensive metal. 

I also do not think I am a good sketcher. I just can't get those 3 dimensional shapes translated on the 2 dimensional paper. Sketching in wax stays all in 3 dimensions, so it feels more natural to me. 
To sketch decent one needs to stay in practice. At the beginning of my architecture career I used to sketch more and had a fairly good sketching hand. Now everything is done in CAD model and drawing software and I barely ever sketch anything. If I ever have to sketch now, it looks horrible to me. Gone are the times when I just hand the contractor a sketch of a detail I want him to built. Now I have to go back to the office and sketch it up in CAD. 


Wax model of ring for fancy cut sapphire

Once I am satisfied with a new design it goes into the next casting run and eventually will be finished in a few weeks time.

Please check out what other EtsyMetal members sketching up right now.


Rebecca Bogan - http://www.AdobeSol.com/blog
Shirlee Grund - http://lichenandlychee.com/blog/
2Roses - http://www.jewelrytutorial.blogspot.com
Beth Cyr - http://www.bcyrjewelry.blogspot.com
Kate Jones http://www.katejonesdesign.blogspot.com
Erin Austin http://metalmusing.blogspot.com/
Michele Grady http://www.michelegradydesigns.blogspot.com
Elizabeth Scott http://esdesignsjewelry.com/blog
Su Trindle http://quercussilver.blogspot.com/
Evelyn Markasky http://markasky.blogspot.com/
ArtigianoJewelBox: http://www.artigianojewelbox.com/category/blog
.

Rainy Weekends

| |
It's Sunday night and I can't believe I have to go to work tomorrow again. Weekends are always too short, even with having the Friday off. I am still trying to work only 4 days at the office, but it does not work out this way all the time.  I don't know why some people love to schedule meetings on Fridays... At least this time I pulled it off and had my 3 day "creation" weekend.

I needed it. Esty is keeping me busy and with the Spring Artful Home catalog out now, there were also some orders for the featured "Aquarius" ring.


Seems the catalog exposure really brings in sales. Since it looks like they want to put the ring in the next catalog too, I need to order more of those aquamarines. Wish they would choose another of my designs with stones that are easier to be sourced. I have such a hard time finding nice oval aquamarine cabs in the size I need. Luckily next weekend happens to be the International Jewelry and Gem show in the LA Convention Center. Already checked with my new supplier for these stones and he confirmed to bring a batch of those gems for me. Hope I don't overspend on other pretty little treasures again. I "hate" going to these shows. It's so tempting. Too many pretty precious things to admire and trade for credit card information. Some girls spend all their money on shoes, I spend it on gems.

Normally I try to do the wax work for the weekly orders all on Friday to be able to do a Saturday cast. But I switched it this week to get a head start on finishing last weekends castings and get a few rings out of the door. I also needed to go to downtown LA in the morning to get some more silver for all these new orders. Almost fainted when I saw the bill for the sterling silver casting grain. It's now over 40$ per toz, crazy! After  finishing some rings, I ended up starting on the wax work at 8pm. This meant having to put in a long night with vacuuming the investment for 6 rings at 2am. And then the rain started.

I realized I really should have checked the weather report before scheduling my casting for Sunday. It was poring cats and dogs all day! Living in LA, I almost forget that it does occasionally rain here. And when it does, it rains hard. My dog Lena did not get out of her bed all day long. She snuggled up in the pillows the entire day and only got up for food and the occasional look out of her doggy door. Wish I could do that too, the pillow part. I miss spending rainy Sundays in bed.


With the rain, every time I checked the temperature outside on the kiln, I got drenched. For better fume ventilation the kiln is outside under a little roof overhang where it does not get direct rain on it. But the overhang is not wide enough to protect me too. Fortunately the kiln electronics did not get affected by the humidity and it finished the 6 hour burn out cycle without problems and one wet caster. Now I have a few castings to finish over the week before next weeks new batch.
Related Posts with Thumbnails